
Homelabs are becoming increasingly more common, and as a result, I wanted to create a multi-part series of guides showing the basics of what you can do with a homelab. This is part one with many more to come. Feel free to leave a comment or shoot me an email at artur ([at]) tyksinski.com if you have any suggestions or something you'd like to see.
This guide goes over creating a new Windows Server 2016 virtual machine on VMware ESXI. The purpose of this machine will be to run the File Storage and will show you how to join the machine to the domain, what roles need to be installed and other things as well as explanations along the way.
VMware ESXI
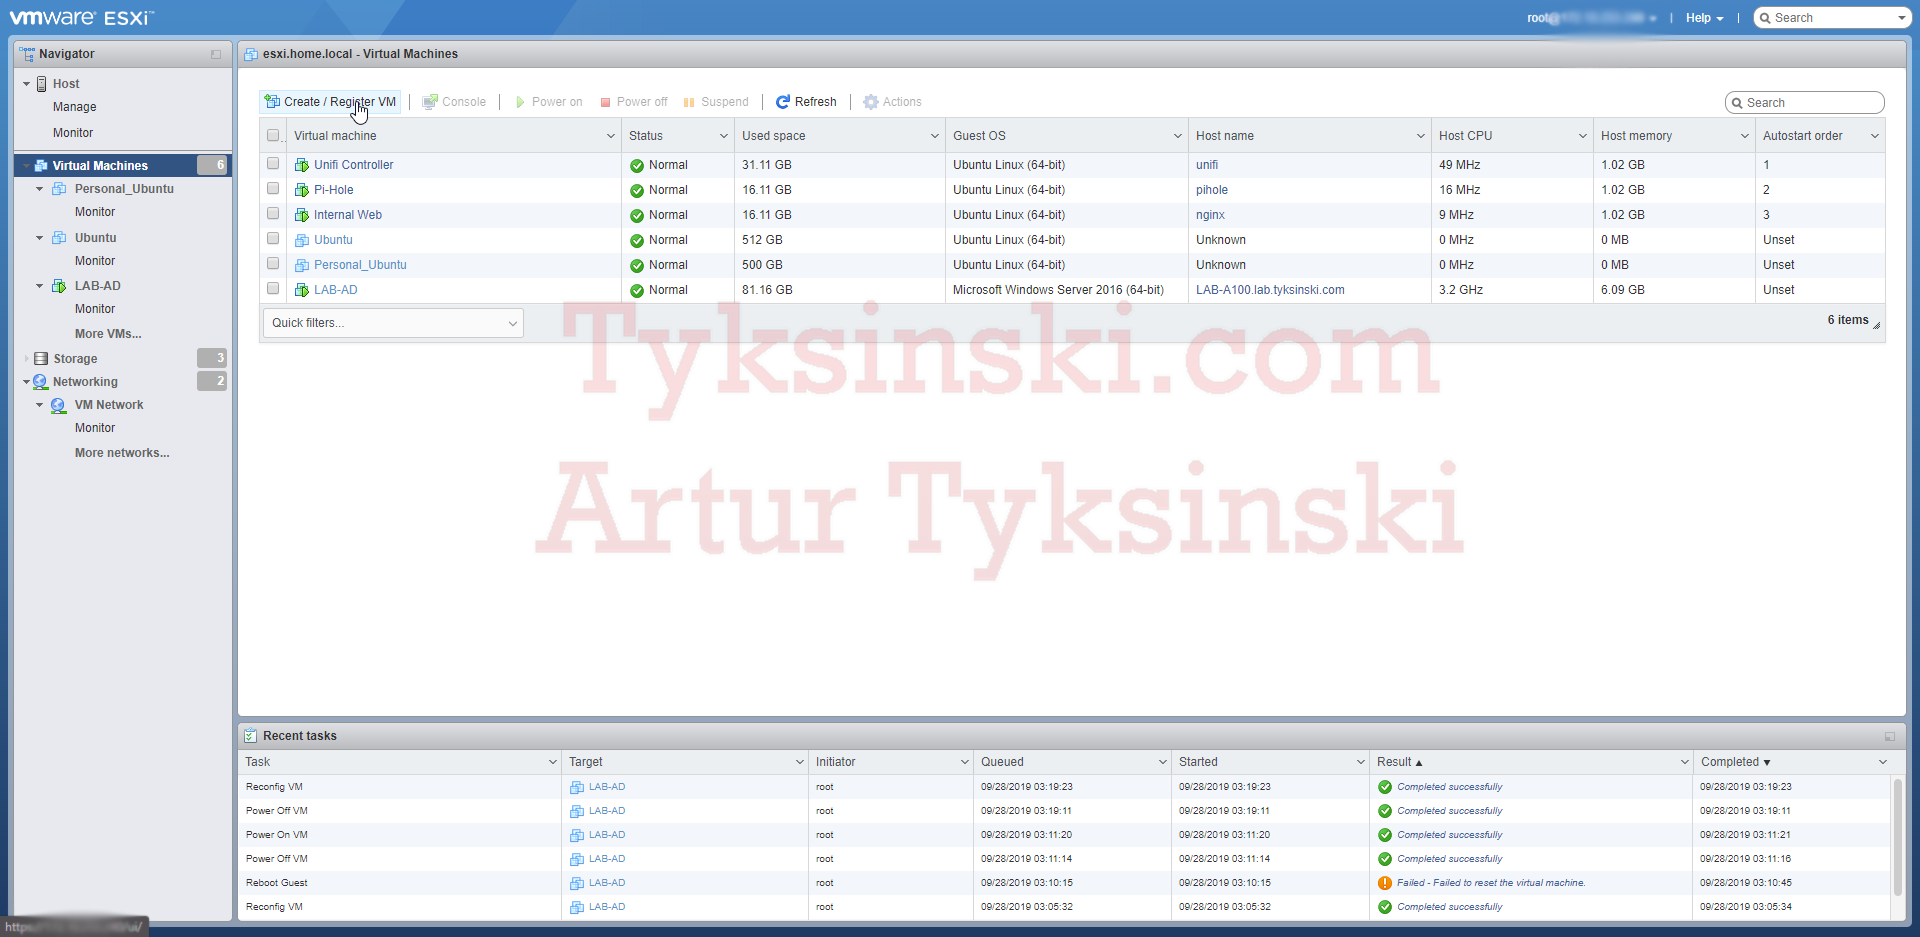
Log in to your VMware ESXI and click on 'Create / Register VM' in the left corner.
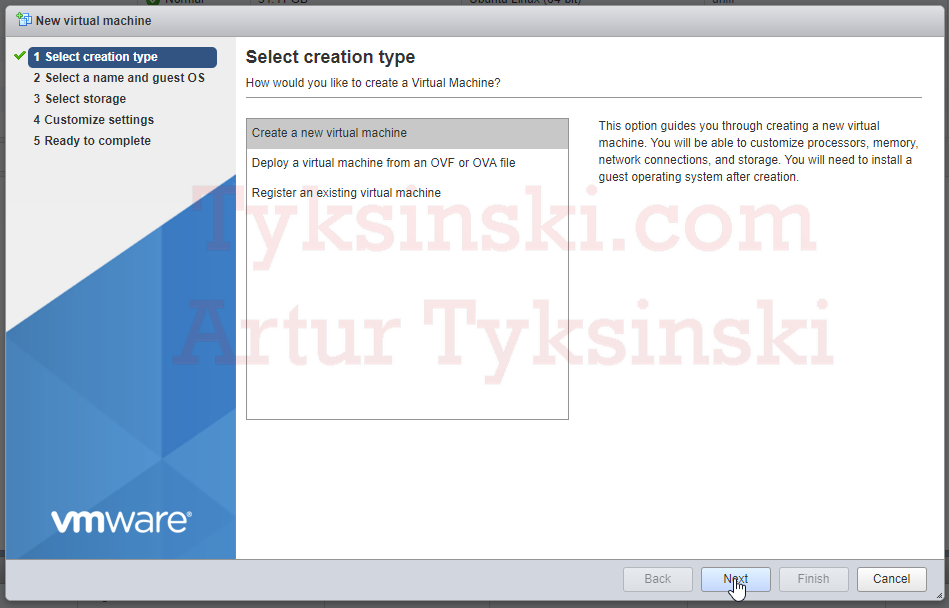
On the 'Creation type' screen, select 'Create a new virtual machine'
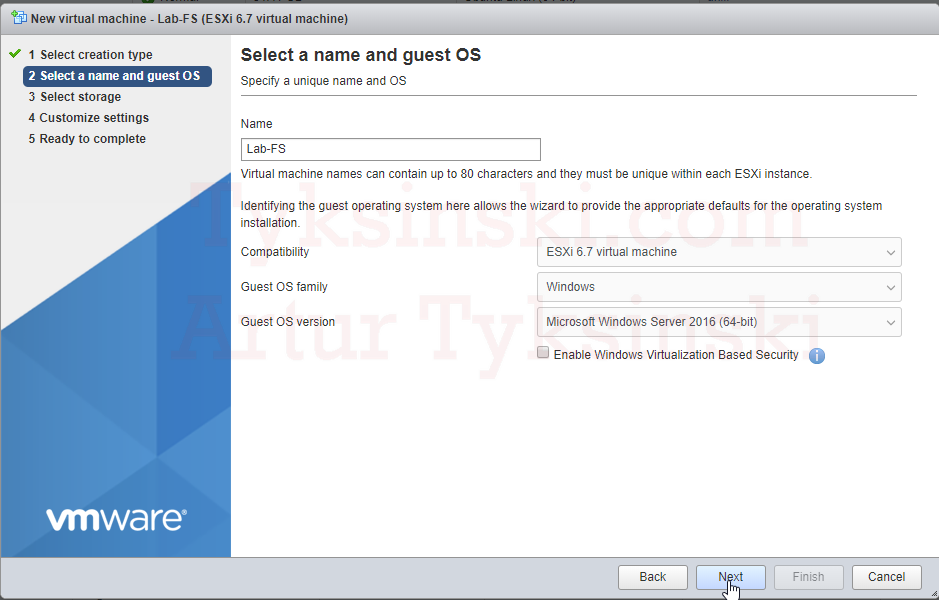
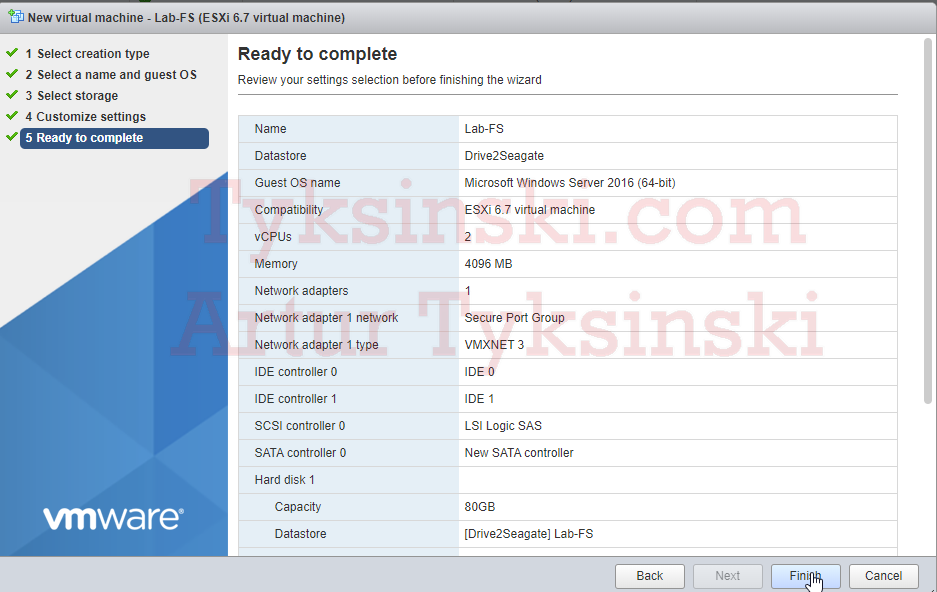
On the 'Select a name and guest OS' screen enter your desired machine name, select 'Windows' for 'Guest OS family' and the appropriate OS version. For this demonstration I will be using Server 2016 (64bit) and naming my machine LAB-FS. Once you're done putting in all the information, select Next.
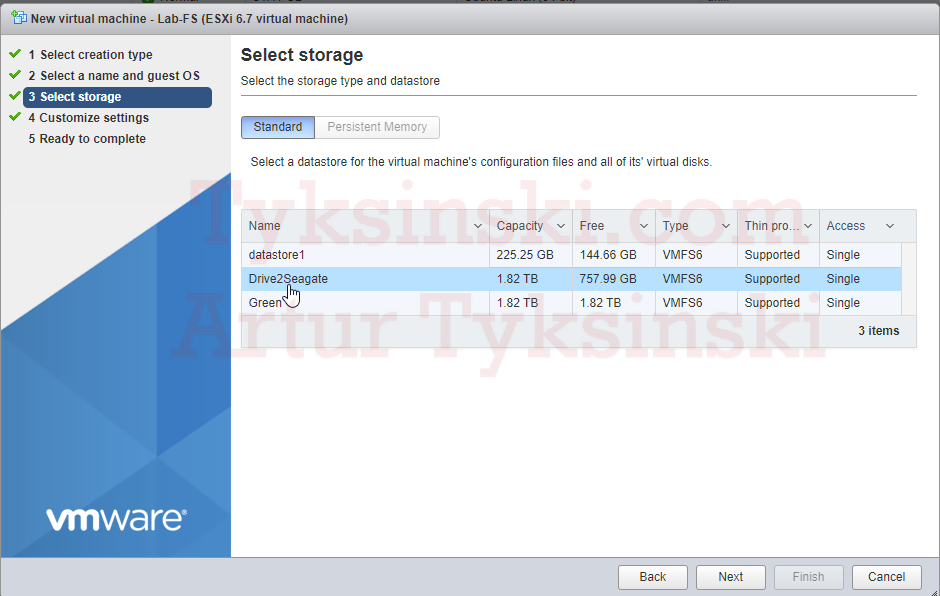
This next screen allows you to select the storage type as well as the datastore for where your machine's main virtual hard disk will reside on. I'm setting mine to run off of a 2TB Seagate drive located on my server.
The 'Customize settings' screen will allow you to select the amount of CPU's, Memory and other hardware you'd like to assign to your new virtual machine. I like to assign, at the minimum, 2 CPU's, 4GB of RAM and at least 50GB of disk space for Windows Server VM's. You'll also notice that I'm using a 'Secure Port Group' which is a VLAN i use to cut off access to my other local devices but allow outbound internet access.
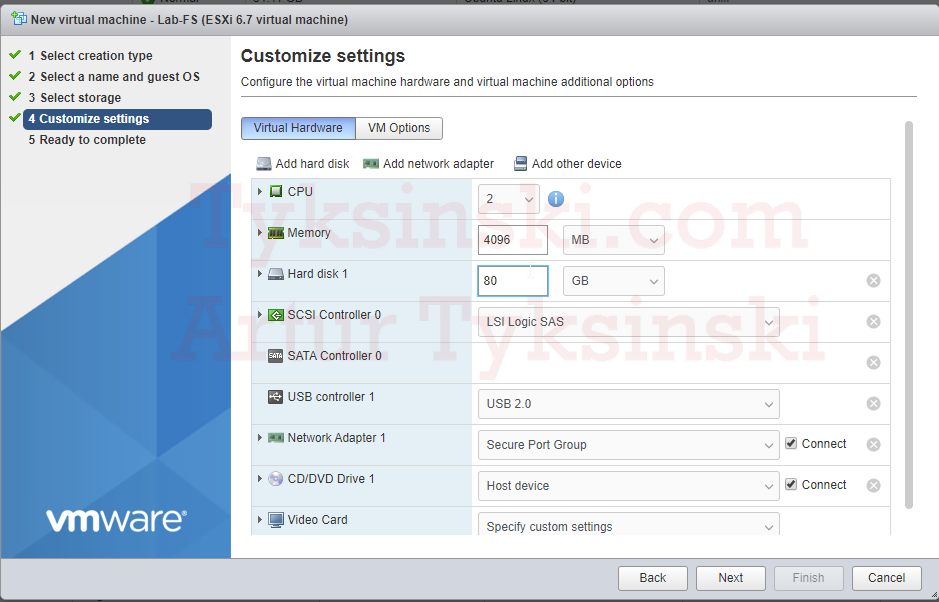
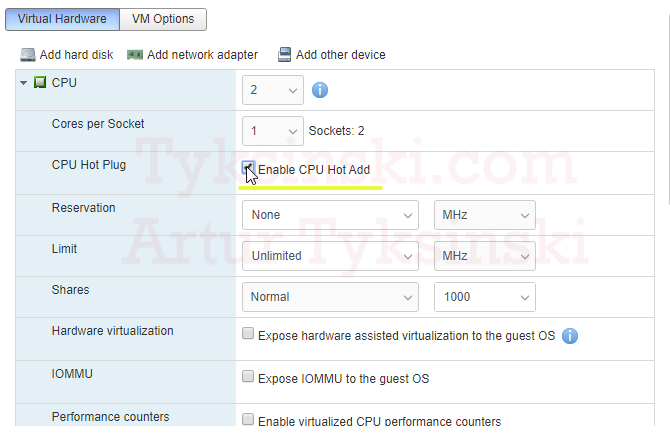
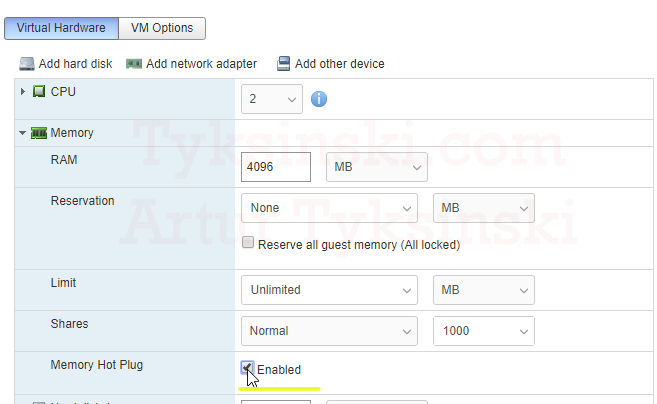
Be sure to enable the CPU Hot Add and Memory Hot Plug, this will allow you to increase CPU and Memory on the virtual machine without having to shut it down.
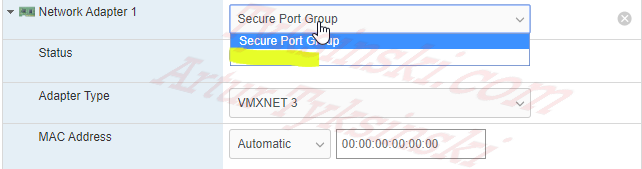
Make sure you select the appropriate network adapter for your network. I have a dedicated Secure Port Group running on a VLAN that restricts the virtual machines from having any access to my local network and other VLANs. As for the Adapter Type, be sure to select VMXNET3. VMXNET3 is a VMware driver while E1000 is an emulated card. E1000 is a software emulated card that takes more resources from the hypervisor and is usually used only for backwards compability.
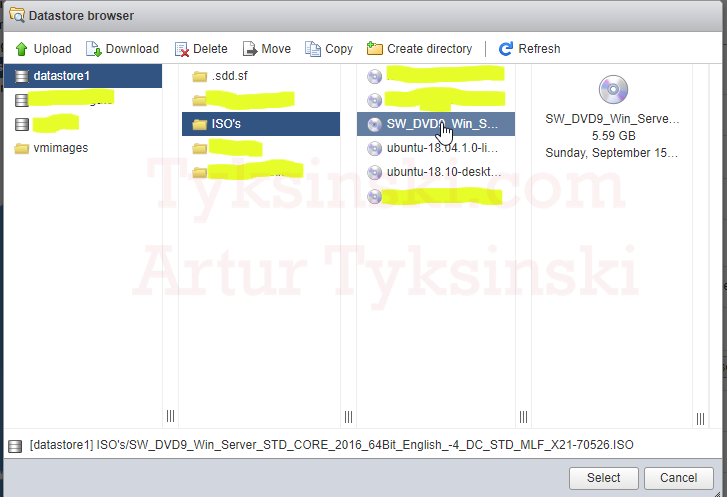
Go down to the CD/DVD Drive 1 section and select 'Datastore ISO file'. This will allow you to select the .ISO which in this case happens to be Windows Server 2016.
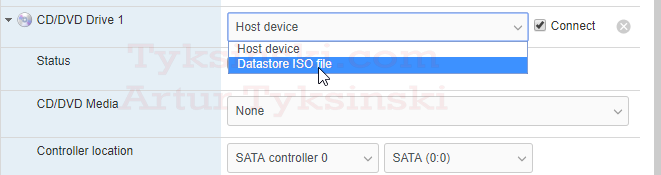
Make sure to select 'Connect' and 'Connect at power on' under CD/DVD Drive 1 and then hit Next.
Hit 'Finish' on Step '5 - Ready to Complete'
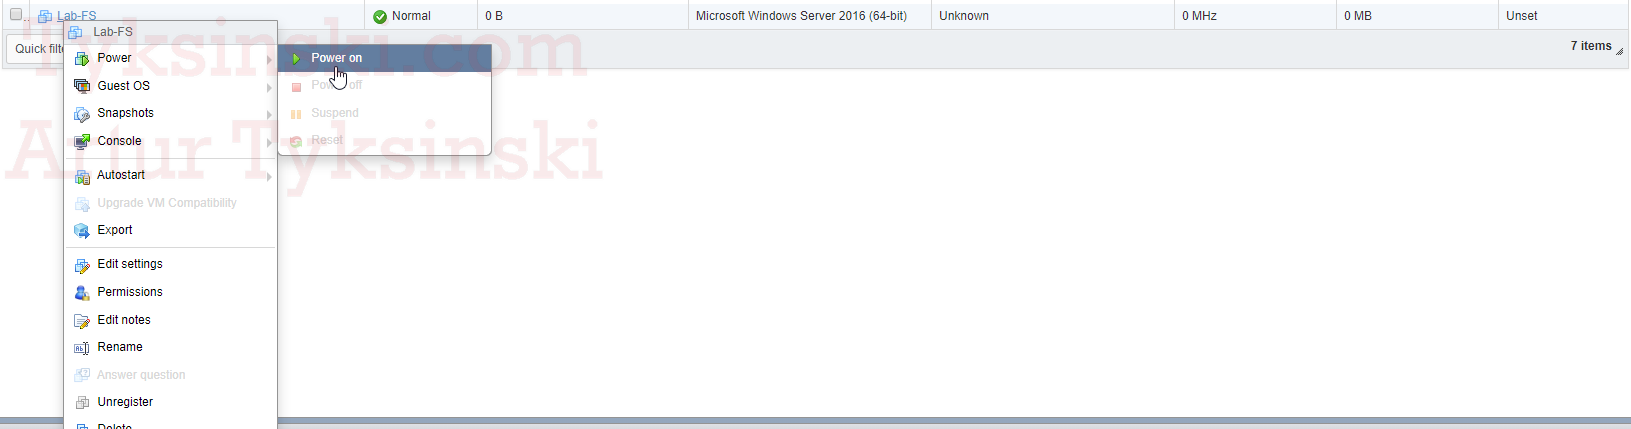
Your virtual machine should now get created. Once you see it in the list of virtual machines, right click and select 'Power > Power On'
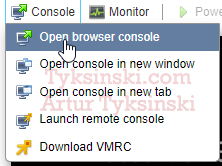
Select the virtual machine once it has powered on, click on 'Console' and then click on 'Open browser console'.
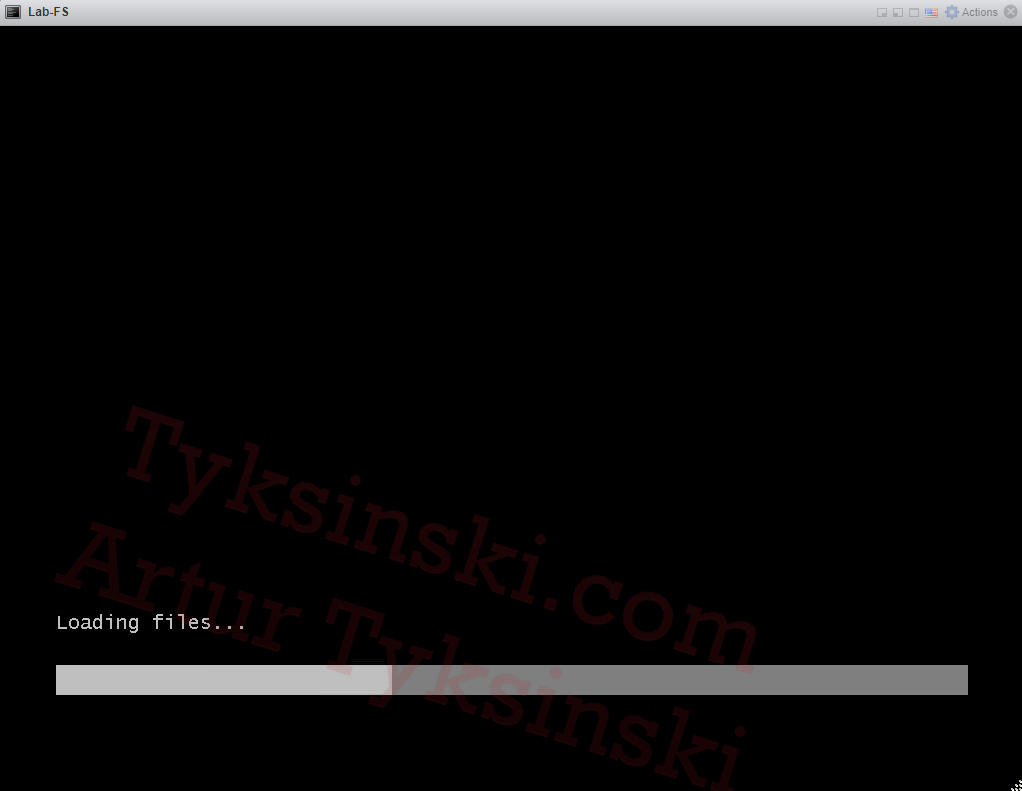
Once the console has opened, you should see that it's loading the Windows installation files.
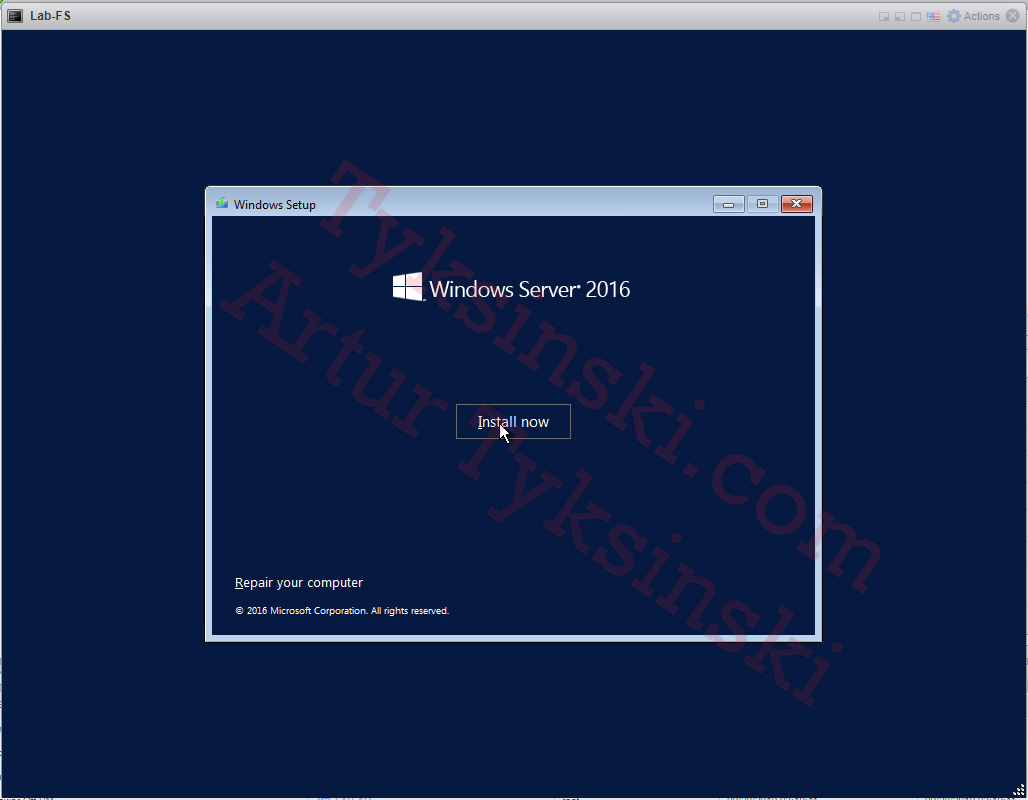
Once the filles have loaded, a Windows Server Installation GUI should open. You may now click on the 'Install now' button as seen below.
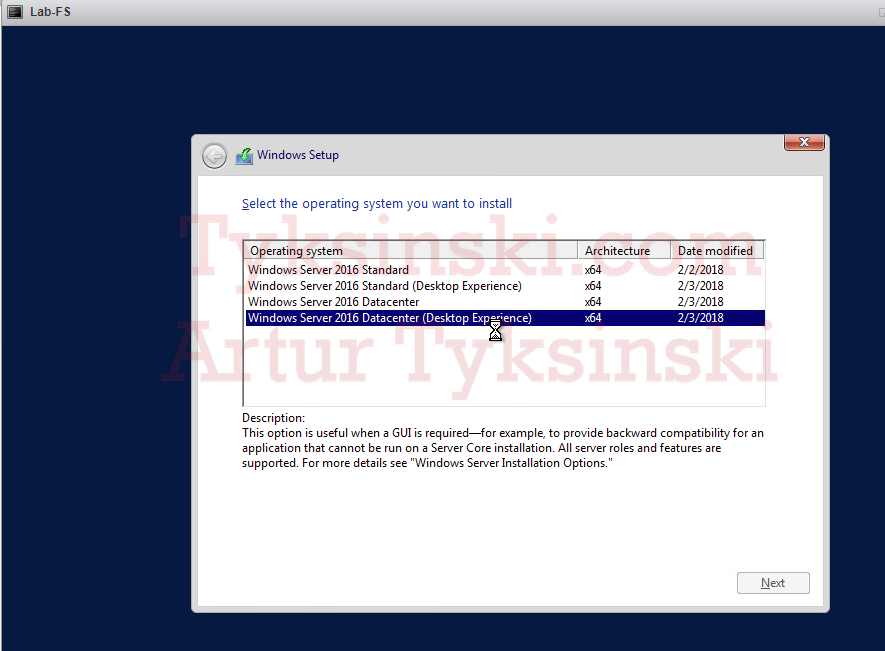
You must now choose the type of operating system you would like to install. In this case, as well as any of my other windows servers, I always select the Windows Server Datacenter (Desktop Experience) edition.
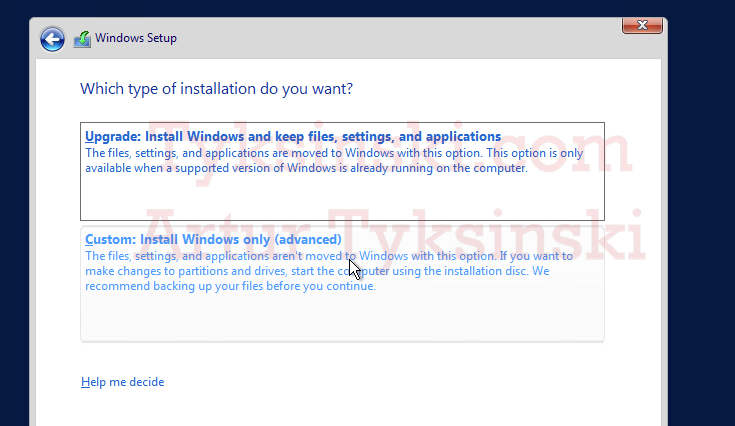
On the screen below, select the 'Custom: Install Windows Only (advanced)' option.
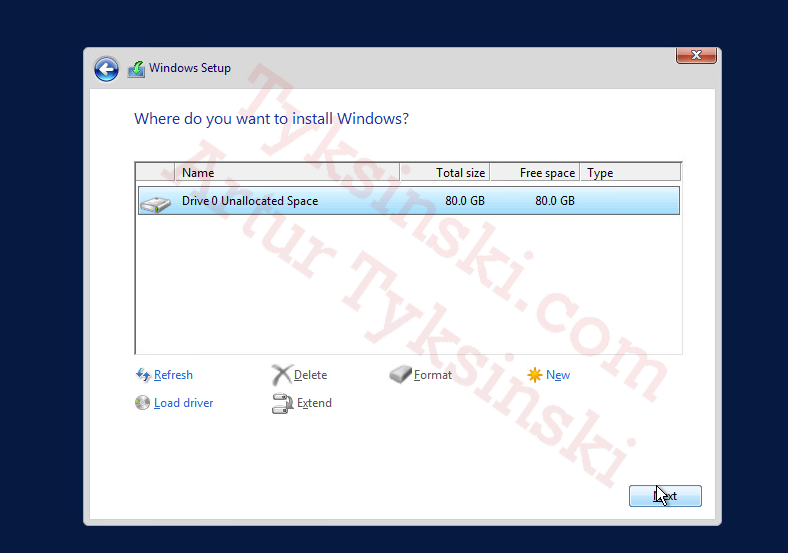
The following screen will allow you to decide which virtual hard drive you would like to install Windows on. If you followed along and only assigned one hard drive to the virtual machine, only one option will remain. Simply select the drive and hit 'Next'.
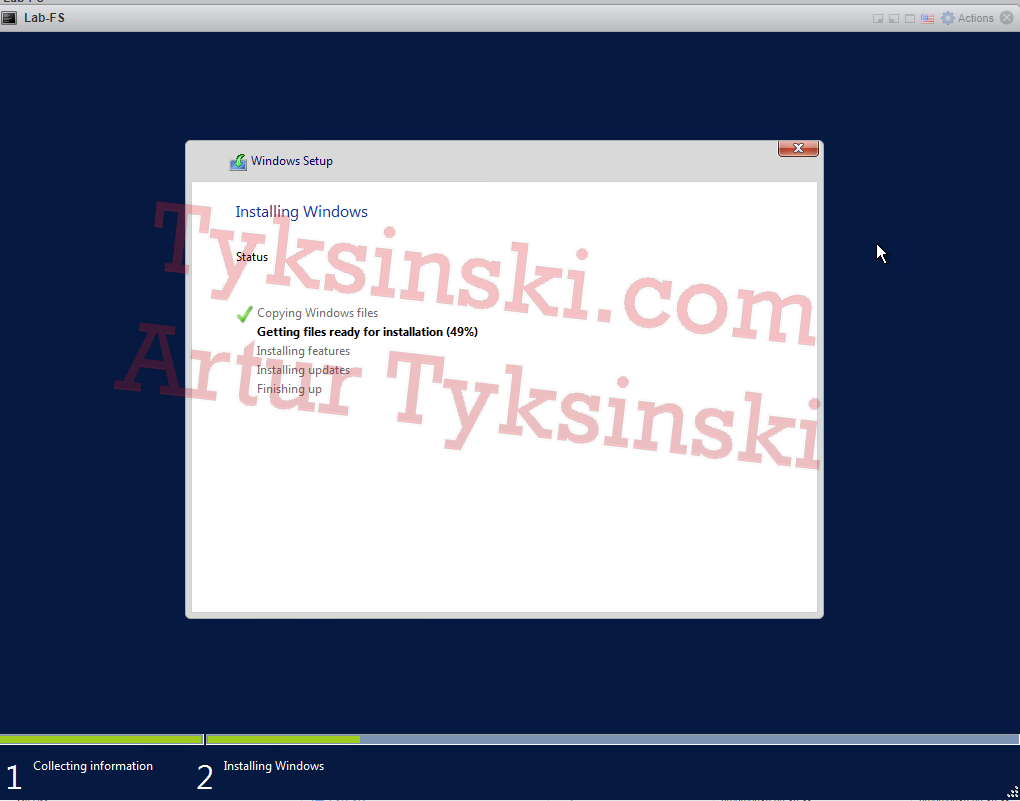
The installation of Windows Server 2016 should now start. Wait for the installation to finish.
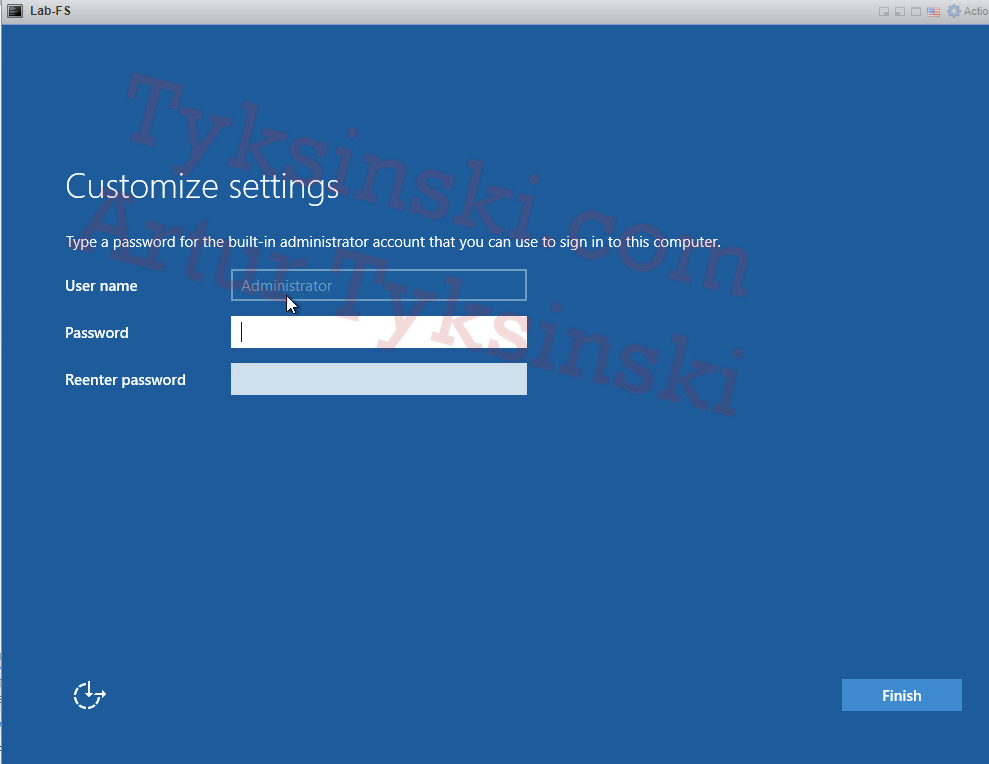
Once the installation has finished, you should receive a prompt that will allow you to set the password for the 'Administrator' account. Fill in your desired password and hit 'Finish'.
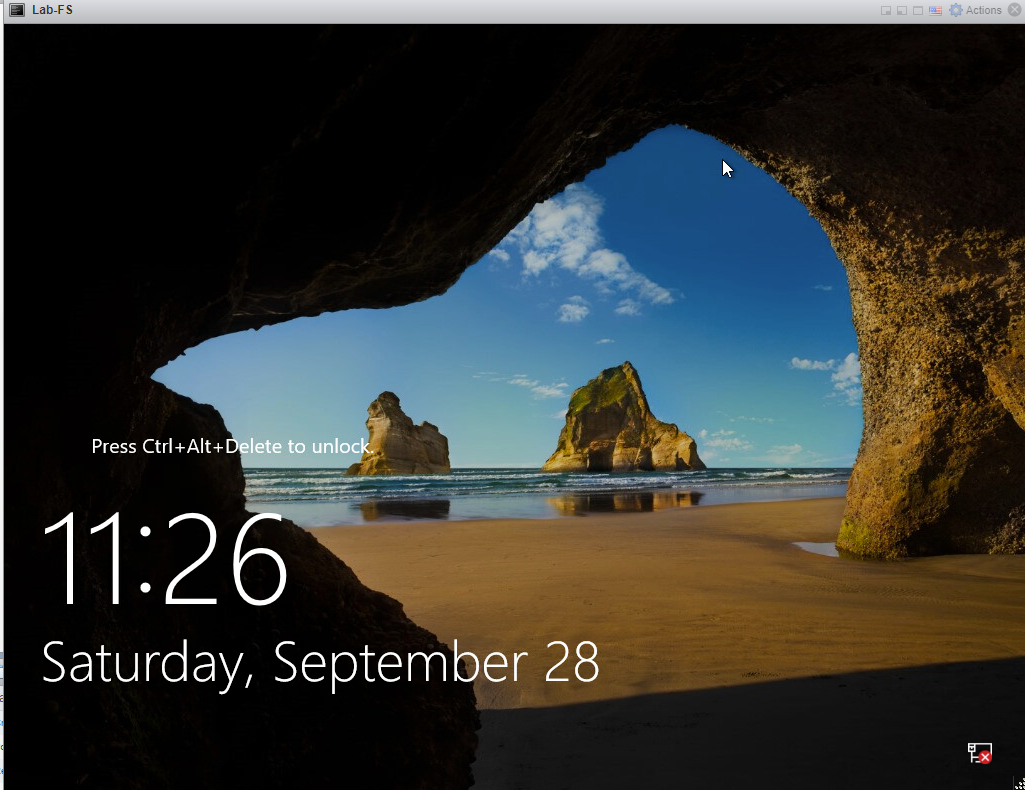
Once everything is done, you should see the lock screen below. You will also notice that the network adapter is currently showing no active connections. This is something we'll adjust once we're logged in to our new virtual machine.
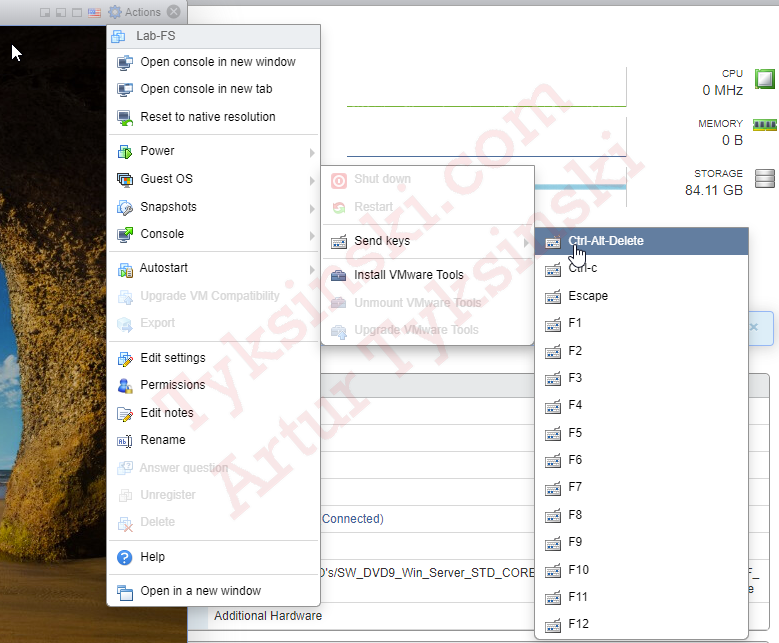
Go ahead and hit the Gear icon up top under 'Actions' then go to 'Guest OS > Send keys > Ctrl-Alt-Delete'. This will send the Ctrl+Alt+Delete combination over to the virtual machine and allow you to enter the Administrative password you've set earlier.
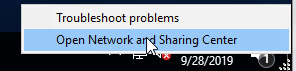
Enter your password and log in to the server. Once you have logged in, open the Run dialog (right click on Start menu and select Run) and enter 'control' to open the control panel. Navigate to 'View network status and tasks' under 'Network and Sharing Center'. You will see that there are currently no networks detected on the virtual machine.
In order to resolve this issue, we will need to install VMware tools as that will include a variety of drivers, tools, and also pass through certain information (such as the hostname and networking information) over to our hypervisor (ESXi).
Navigate back to the Gear icon 'Actions' and then select 'Guest OS > Install VMware Tools'. This will mount the VMware Tools ISO on to your virtual machine and allow you to install VMware tools.

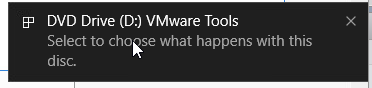
Wait around 5-10 seconds and then click on 'DVD Drive (X:) VMware Tools) [where X is the drive letter assigned to your virtual CD/DVD reader].
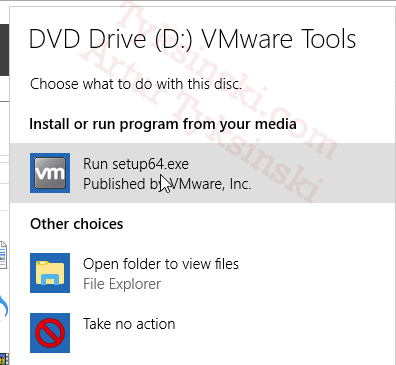
On the 'Choose what to do with this disc.' screen, select 'Run setup64.exe'.
Once the VMware Tools Setup has opened, click on Next.
On the Setup Type screen, select 'Typical' and hit 'Next'.
On the 'Ready to install VMware Tools' screen, select 'Install' and await the installation of VMware Tools.
While VMware Tools is installing, you may see that a Network adapter is detected and connected to the internet once you receive the following pop-up:
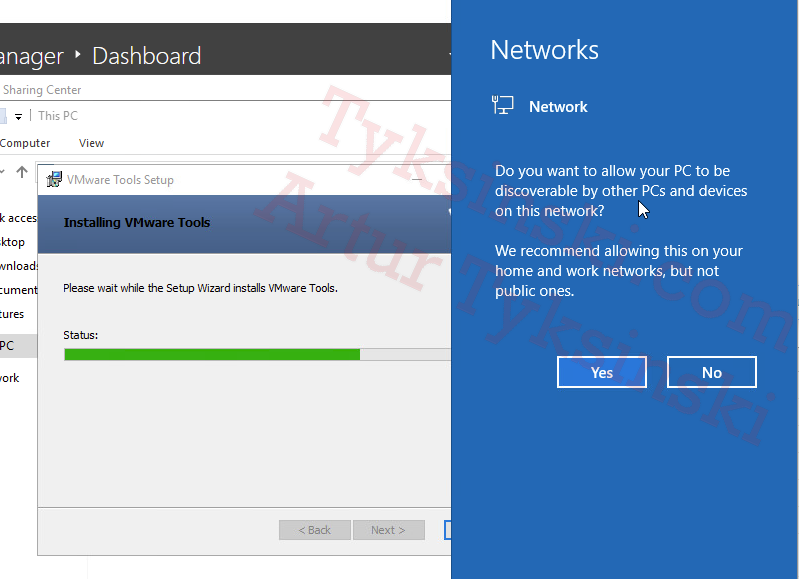
Once the installation has finished, click on 'Finish' then select 'Yes' to the restart pop up.
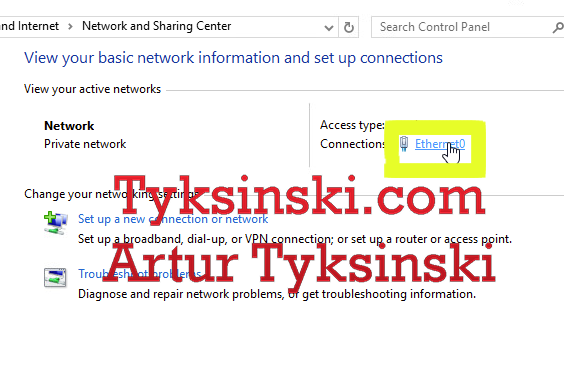
Once the virtual machine has rebooted, log back in to the server and head on over to the 'Network and Sharing Center' again.
We have to do this to ensure that the primary DNS server for this virtual machine is set to the IP address of our Active Directory server (a/k/a Domain Controller). Select 'Ethernet0' under Connections.
Go to 'Properties' and then double click on 'Internet Protocl Version 4 (TCP/IPV4').
In the 'Internet Protocl Version 4 Properties' window, I will be assigning this machine a static IP address as well as setting the Preferred DNS server to be the IP address of our primary domain controller. This will ensure we are able to join this server to the domain. Once you've entered the IP address and DNS server that you're using on your network, click OK.

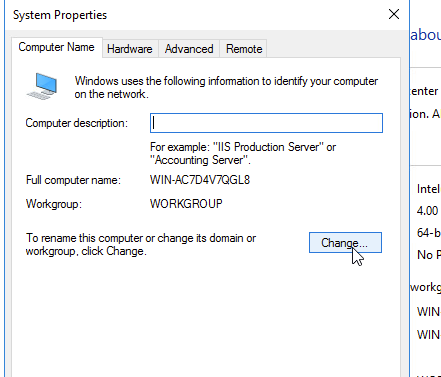
Open up File Explorer and right click on 'This PC'. Select 'Properties'. In the new Window that opens, select 'Change settings' under 'Computer name, domain, and workgroup settings'. The first thing we will be doing is changing the Computer name from the randomly generated one to a friendly name that can represent the function of our server. As this is a file server inside of my lab environment, I will be naming it LAB-FS.

Once you have clicked on 'Change settings', a 'System Properties' window should pop up. Click on the 'Change...' button located on the middle right of that window.
Enter your desired computer name and leave the computer on the default workgroup for now. Changing a computer name requires a restart and if you change the computer name and join the computer to the domain, the new name will not be reflected right away. I prefer to change the computer name, restart and then join the computer to the domain.
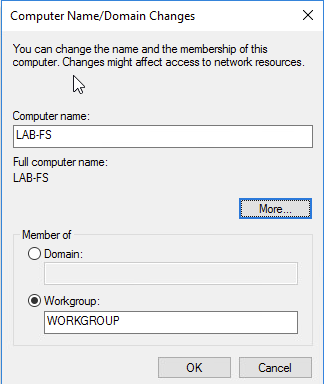
Select 'OK' and restart the VM when asked to. Once the virtual machine is back online, log back in and head over to the same 'Computer Name/Domain Changes' settings.
You may now click on the 'Domain:' radio button under 'Member of' and enter your internal domain. In my case, my internal domain is lab.tyksinski.com (Microsoft recommends against using any domains that you do not own or that do not exist [such as .local] )
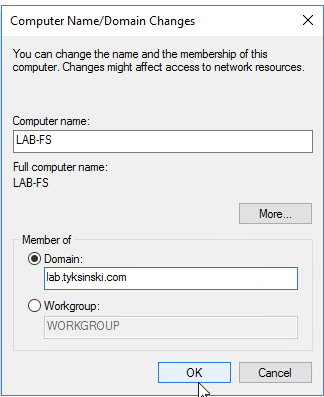
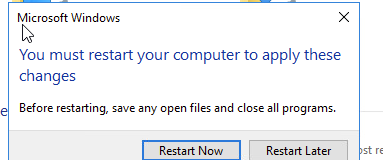
Click 'OK' and allow the virtual machine to restart again.
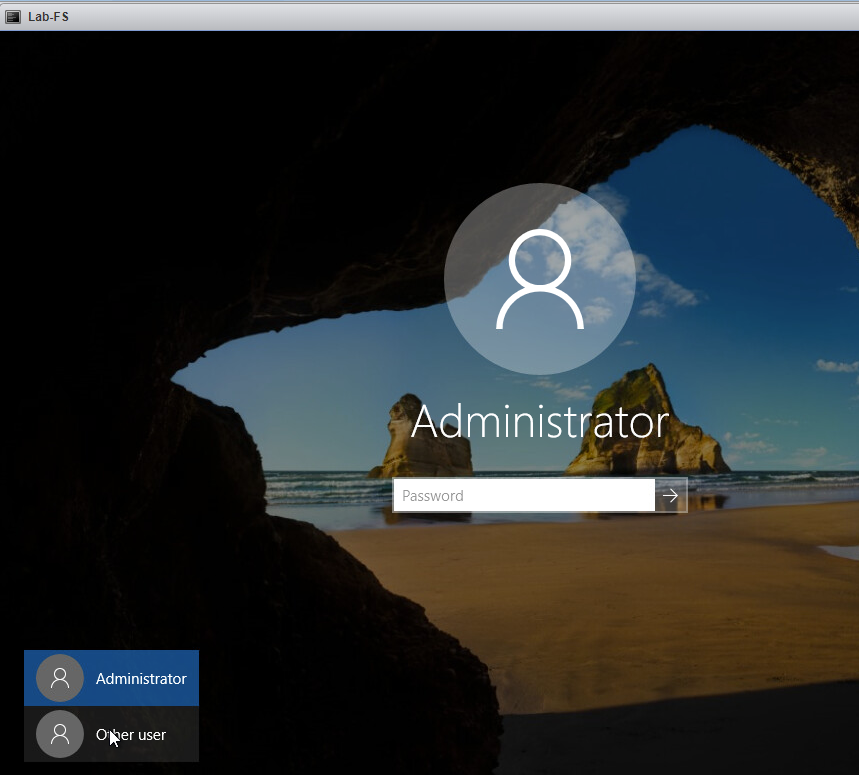
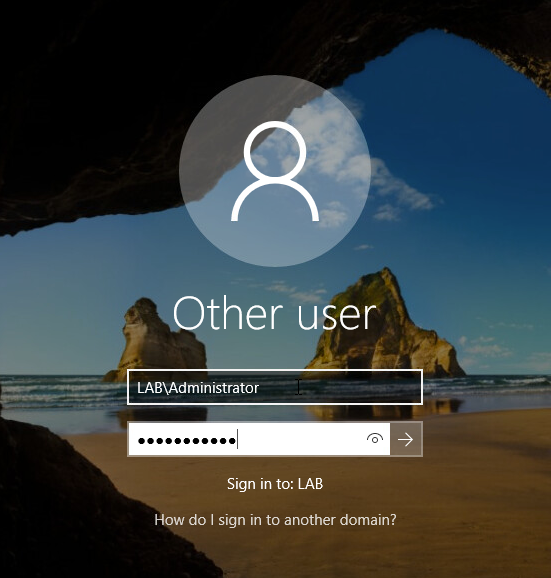
Once the virtual machine is back online, send the CTRL-ALT-DEL keys and click on 'Other User' to sign on as the Domain Admin (rather than the local Administrator).
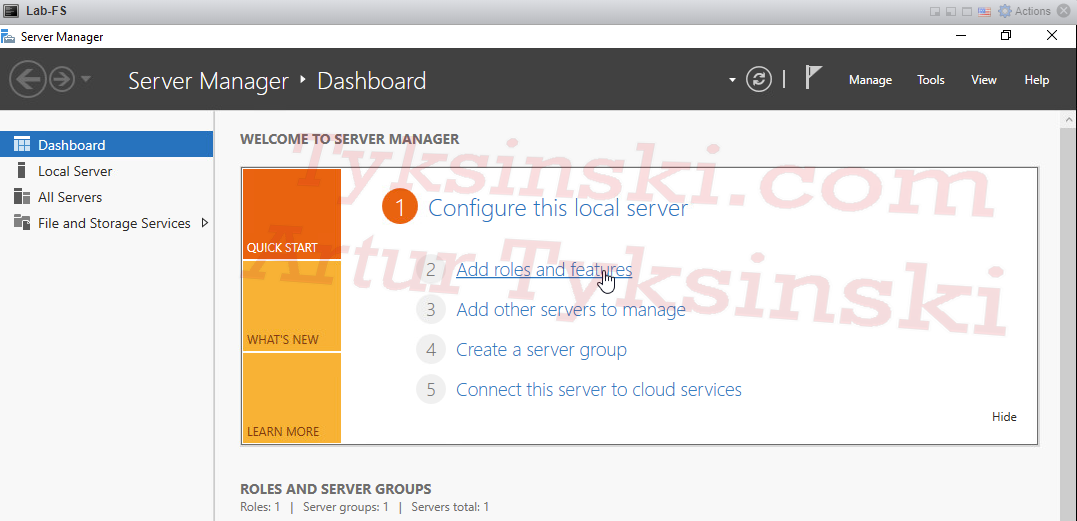
Wait for your new profile and the desktop to load. Once Server Manager has opened (it does so automatically) wait for it to finish loading and then select '2 Add roles and features'. This will allow us to install the File Server role (although not necessary).
Select next on the 'Before you Begin' screen and proceed to Installation Type.
Leave 'Role-based or feature-based installation' selected and click on 'Next >'
On the 'Server Selection' screen, ensure you select the new server (in my case LAB-FS.lab.tyksinski.com) and click on 'Next >'
On the 'Server Roles' screen, scroll down to 'File and Storage Services' and select the roles you would like to install. In my case, you can see what I've selected below.
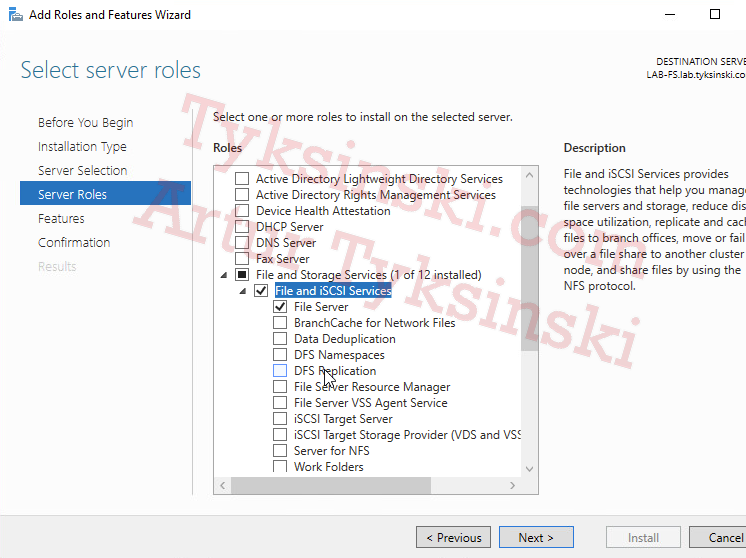
Once you've selected the roles you want to install, click on 'Next >'. On the features screen, click on 'Next >'. On the 'Confirmation' screen, click on 'Install' and wait for your newly selected roles to finish installing.
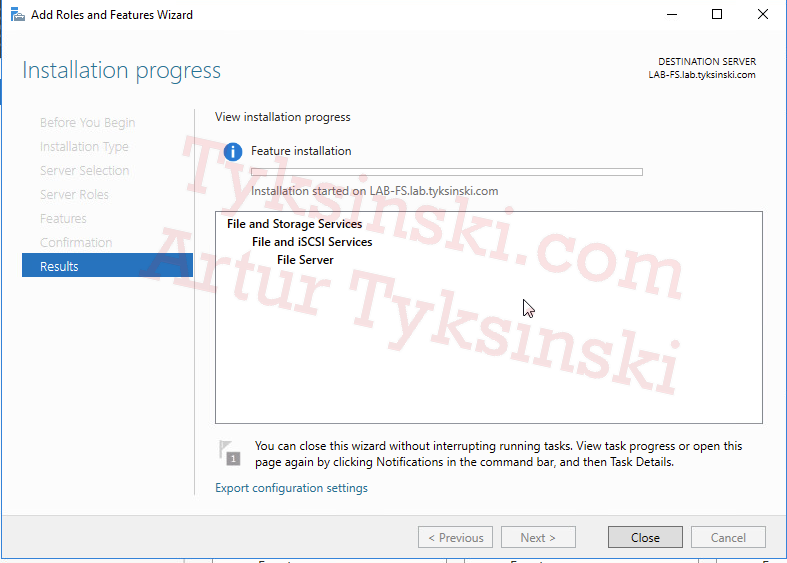
Once the installation has succeeded, you should see that 'Installation succeeded on COMPUTERNAME.DOMAIN.TLD'.
Congratulations, you now have a Windows File Server joined to the domain with the necessary File Server roles installed.
Stay tuned for future guides.
Artur Tyksinski
My plan is simple: any time I encounter something more than once or something I have to thoroughly research, I plan to write about it. I am a Systems Admin and do quite a lot of DevOps as well.